Showing posts with label crafts. Show all posts

Tuesday, June 5, 2012

The Nursery

The nursery has been a work-in-progress for about 5 months. We hemmed and hawed over which room to convert (the guest room or the Steelers room) and when Ben finally agreed that the Steelers room made the most sense, I wasn't about to argue. He began the (slow) process of cleaning it out sometime shortly after the holidays, and my mom & Christian (AKA "Gigi" and "Sweetie") came down to paint in early February. I knew I wanted gray walls regardless of the gender, and we decided on Voyage by Valspar. It actually ended up a bit blue for my liking, but once the furniture went in, I was good with it.

In the meantime, we've been slowly purchasing her furniture (ouch!) and putting things together ... and then completely rearranging them because my pregnancy hormones make me indecisive.

The Nursery, Before:
I know what you're thinking - why wouldn't you just leave it as is? What baby WOULDN'T want this room? (Yes, my husband actually said those things)

I'd love to use this post to tell you about all the great crafts I did for her room, or the designs I used that were inspired by Pinterest, but honestly ... I got pretty lazy. I guess there's still time, and I'm going to need something to keep my mind occupied for the next few weeks!

The Nursery, During:
We did a few renovation projects (besides just the paint). We bought her crib (very similar to this one) from a consignment sale, so Ben touched it up before putting it together with his dad. I forced asked Ben to paint the closet, which he then took to the next level by adding an additional bar and shelf - so grateful for all that space!


After several failed attempts at ordering cute bedding sets online, I finally gave up and ordered plain white separates and bought some pink patterned sheets at Target. Just a head's up:

I finally landed on Tadpoles White Tulle curtain and crib skirt, Super Soft Dot Crib Bumper from Carter's and a variety of Circo pink crib sheets (stripe is pictured, and we got the gingham and the lattice)


As you might remember, the dresser search was one of my greatest pregnancy woes, but I am so pleased with what we finally settled on. The pink gingham knobs Ben put on (to match the pink gingham curtain rod finials and pull-back) are some of my favorite touches! We decided that, given the small space of the nursery, it made sense to use the dresser as a changing table rather than having two pieces of furniture, so we added a changing pad (passed down from Sloan) and we're good to go!

The "final" touches were all the wall-hangings. Actually, that's not true, the final touch will be the rocker recliner that is scheduled to arrive about a week after her due date (oops! #parentfail). But before that, and before putting together the nightstand (that I decided we needed after rearranging the room ... yes, I moved a 150lb dresser at 8 months pregnant!), we needed to hang all the beautiful wall-hangings. The letters were something I've wanted forever, but Ben was very particular about the font, so I found a custom site where he could order something to his liking and I painted them white and attached pink ribbon with a glue gun. The distressed wood sign came from "Aunt Kiki" (my best friend Kelly) with one of my favorite verses. She was there for me during the devastation from my ectopic pregnancy last year and knows very well how much this little one means to us - and to her! It was actually ordered before we found out we were having a girl - that's how sure she was that she was going to have a niece. The prints actually started as a contest that I won from a friend's blog several months back. I contacted the etsy vendor and asked if we could wait until we had picked nursery decor, and she gave us a wonderful deal on the additional custom prints so we could do a set of three.


The Nursery, After:
I'm so pleased with the way it all came out. It is such a calming feeling to walk in there and just "be" - anticipating the precious girl that will soon inhabit those walls. The room is just as much for me as it is for her at this point, and I feel very serene when I walk in. And it's feminine without being too girly, young without being too babyish, and easily convertible to a guest room (if we sell) or another baby's room (if we don't sell) should the time come.
the view walking in
the view from where the chair will go
Lucy seems to enjoy it too - we've left the door open so she can get used to the changes and she has yet to mess with all of our sweet girl's toys - I'll take that as a win!

Tuesday, February 14, 2012

Craft Corner: Easily Changeable Photo Frame

I made this almost two months ago but just saw it on Pinterest again and was reminded I never posted it. So here you have it, a photo frame with an easily changeable picture. I made these for my mom and mother-in-law for Christmas with a picture of baby L's sonogram (at 12 weeks, tiny peanut!), knowing they'd want to update with actual pictures once she's born.

What You'll Need

  • Picture frame (I got mine for $5 at Michael's)
  • Clothespins or Magnetic Clips
  • Paint (depending on what you use as your clip, you'll either want paint that's suitable for wood or metal, like Rust-Oleum)
  • Exacto Knife (Scissors will work if you don't have an exacto knife)
  • Scrapbook Paper and Glue OR Adhesive-backed Fabric Paper*

This might be the coolest thing ever.
I found it by chance at A.C. Moore,
and I'm really hoping it wasn't a one-time thing

What You'll Do

  1. Remove the glass from the frame
  2. If you want to paint the frame, go ahead and do that and paint the clip to match. I used a white frame so I just painted the clothespin white, making sure to squeeze it open before it dried completely shut
  3. Trace the glass onto the scrapbook paper and cut with an exacto knife
  4. If using regular scrapbook paper, use acid-free glue (either spray adhesive or a glue stick would work); If using adhesive-backed paper, peel back off and press to glass
  5. Replace glass in frame once all parts are dry
  6. Measuring the center with a tape measure or ruler, use a hot glue gun (or super glue) to affix the clip to the paper-covered glass. Depending on what size picture you want to use, you can either do this vertically or horizontally, but I recommend doing it close to the top of the frame
  7. Once EVERYTHING is dry and stable, clip in your picture and change it as many times as you want!


Tuesday, October 25, 2011

Craft Corner: Aubrey's Wedding Gift

I started to post this last week, then remembered that Other Aubrey follows me and I didn't want to ruin the surprise! I made this invitation ornament based on an idea from - you guessed it - pinterest.

The photo was originally pinned by ...from glitter to gumdrops and there's a lot of sweet ideas on there. And they're simple. Y'all know how I need love simple.

So here you have it:

What You'll Need

  • Round, Glass Ornaments that have a removable top (available at Michael's in a 4-pack)
  • The Invitation in question (could be wedding, baby shower, anything!)
  • Scissors
  • Coordinating Ribbon
  • Round Straight Pen


What You'll Do

  1. Remove the top of the Ornament
  2. Cut the invitation into strips; I used each line of the invite as a strip
  3. Curl each strip around the pen
  4. Gently "shove" them into the small hole in the ornament, taking care for special words (their names, the date, etc) to show on the outside glass; you can use the pen to move them around if necessary
  5. Replace the top
  6. Tie a coordinating ribbon through the top of the ornament to hang it and include coordinating charms on ribbon (optional)


Ta Da!

Tuesday, October 11, 2011

Craft Corner: Hand Painted Wine Glasses

It's a general consensus that Whitney over at The Pink Elephant must never sleep. Somehow, between working 75-hour weeks, hitting the gym, and attending 34 weddings a year, she finds time to craft, paint, cook, create, refurbish and dress up her little dog Olivia in hilarious costumes. I don't know how she does it!

But, lucky for us, she shares her secrets. And lucky for me, I'm a pretty good copy-cat. So here you have Whitney-inspired hand-painted wine glasses, that I made as my secret seashell gift for other Aubrey.

What You'll Need

  • (4) Wine Glasses (I got mine from the dollar store!)
  • Glass Paint & Sealant (available at A.C.Moore)
  • Thin Paint Brush
  • Print out of monogram you wish to paint


  1. Tape the monogram inside the wine glass, with the letters facing out toward you
  2. Using the print-out as a stencil, paint with your desired color of glass paint
  3. Let dry for recommended period (I think it's probably overnight, but the paint should say)
  4. Repaint with sealant
  5. Let dry for 10 days


Whitney used these as a bridal shower favor, mine was a gift for a friend who's about to get married ... either way, it's an inexpensive yet thoughtful - and useful - gift!

Tuesday, October 4, 2011

Craft Corner: Wine Cork Monogram

Even before I knew it, I loved pinterest. I had girlfriends send me photos, ideas, recipes, etc. from there all the time. The Wine Cork Monogram I made for Aubrey is a perfect example.

Before we go any further, I should mention, in case I haven't already, that yes - my name is Aubrey. And yes, this is a relatively unusual name, especially for women, and especially for women of my general age range. And yes, one of my best friends from age 15 until present is also named Aubrey.

Now then, back to the Wine Cork Monogram. This was a gift from me to other Aubrey for homemade Secret Seashell. And I think it's a-dor-a-ble (and so is other Aubrey) and so easy to make. 


What You'll Need:
  • Cardboard
  • Scissors
  • Print-out of letter(s) you wish to make
  • Glue Gun + Glue Sticks
  • A Shit Ton Lot of Wine Corks
  • Picture hanger, available at any craft store
sawtooth picture hanger, should come with 2 nails
  1. Cut the cardboard to fit the template of the letter you want. Hint: The thinnest part of the letter should be slightly thinner than a wine cork, so the cardboard doesn't show.
  2. Place the corks to ensure you have enough
  3. Fire up your hot glue gun and get to work!
  4. Once complete, place a heavy book or other flat object on top to ensure they're drying flush to the cardboard
  5. After they're totally dry (shouldn't take more than 15-20 minutes but you can leave for a few hours just to be sure), nail in the picture hanger to the back
Again, I must give credit to The Elephant's Trunk, the blog that originated the idea for me, put in my field of knowing by Caroline. Also, to Sara Cobaugh who supplied 99% of the wine corks.


Monday, August 29, 2011

Craft Corner: Baby Alphabet Book

Not so much a craft as it is a project, but still, a little DIY action never hurt nobody.

Something you should know about me: My design-minded friends be damned, I use the heck out of some Microsoft Publisher.

It started with a welcome banner for my assistant, which evolved into a variety of banner types for every occasion: bridal showers, bachelorette parties, birthdays, baby showers (and births) ... even a welcome-home-dog-who-ran-away banner. I am the go-to girl for party decorations in our department, a title I take very seriously and may be featured on the next iteration of my resume.

But I digress, this post is about the Baby Alphabet Book project we did for Grace's shower. It was specifically requested by the DIY queen herself, Leslie, and I'm happy to make anyone's "job" easier by sharing the documents I already created. Of course, feel free to adapt these templates with font changes or sizes to fit your needs.

What You'll Need:

  • Scrapbook (preferably not the 12x12 books, as that will be a challenge to print)
  • Printer
  • Microsoft Office Suite
  • 26 Sheets White Paper (color copy paper is slightly thicker)
  • Art Supplies: Markers, Crayons, Stickers, Stamps, etc.
  • Scissors or Paper Cutter (I have one from scrapbooking) 
  • This Template


So easy, and stuff you already have (minus maybe the scrapbook, I used a pink 8x8 book from Michael's for this baby girl with a 40% off coupon). Just print the sheets, cut them to the size of your book, and let the guests expose their hidden talents. Make sure you ask all the artists to sign the back of their page so Mom can tell Baby who made each letter, and TA DA! you have a personal record of all the shower attendees that will be enjoyed by Mom and Baby alike.

Wednesday, August 17, 2011

Craft Corner with the Jotas

I'm not sure if I've introduced you, dear readers, to my very best group of girlfriends. The good news is, I imagine half my subscription base pools from those girls, so only a few of you may potentially be in the dark.

Sarah's Wedding, 2008

Things you should know about my very best group of girlfriends:

  • We refer to ourselves as Ese Jota (long story)
  • We went to high school together (some went to middle school together, and even PRE-SCHOOL, but we all came together in high school) in Manassas, Virginia
  • We (some of us, I'm looking at you Courtney, Abby, Tressa & Rachel) have matching tattoos of compasses (there's a story there, too)
  • We are currently located in 8 cities across 5 states and span two coasts 
  • The foundation of our friendship is rooted in celebrating Secret Santa

Secret Santa 2007

Eventually, when we all started getting married and having in-laws and our parents moved away from the town we grew up in, it became harder and harder to get together every Christmas to do Secret Santa. Someone had the brilliant idea to switch it to the summer time, and move the location to the beach, and the natural progression of things was to change the name to Secret Seashell. So each year, the nine of us and our "playthings" (read: dates, boyfriends, fiances or husbands) get together at a beach house somewhere on the east coast and exchange gifts but mostly get drunk.

Secret Seashell 2008

From May 2011-May 2012, we have four weddings in our group of nine. FOUR. Plus four bachelorette parties, and 27 bridal showers (23 of them were for Kelly). That might be an exaggeration, but regardless, it's an expensive year for Ese Jota. Our solution was to forego the traditional beach trip for a "Raleigh Weekend", and replace our traditional $50-$75 spending limit for gifts with the mandate that they must be homemade. For some of the girls, this is no problem; namely, the one who sews & crafts for a living. But for others of us (cough, Tressa) it was a challenge.

Everyone put so much love and effort into their gifts, and the results were awesome. So many cute ideas that you will likely see me re-use for gifts in the upcoming future. Here are the highlights (until I get more pictures):

Clemson-colored Bath salts and Soaps from Jenny to Kelly (she's gonna love me for this photo) - one even had a tiger in it!

Skirt Apron and Reversible purse from Abby (the aforementioned professional seamstress) to Rachel; the matching wine coasters are pictured below


A very long-awaited "Edward, Size Large" (in t-shirt form) - look how enamored she is! The quote reads "Look After My Heart ... I've Left It With You". I never got into the whole vampire thing, so it's just creepy to me, but whatever.
Personalized stationary from Aubrey Hale to Sarah


Really adorable Map-Frames from Kelly to Tressa (again, probably gonna kill me for this pic). One is of Hilton Head, SC (where Tressa & Greg are getting married in October) and one is of the Arlington, VA area (where they live). Expect to see these again, I love-love-love this idea (found on pinterest).

 
A garden stone, complete with all of our pictures incorporated, made by Tressa for me. This is such a huge accomplishment for Tressa, you have no idea, and I LOVE it! Adorable.

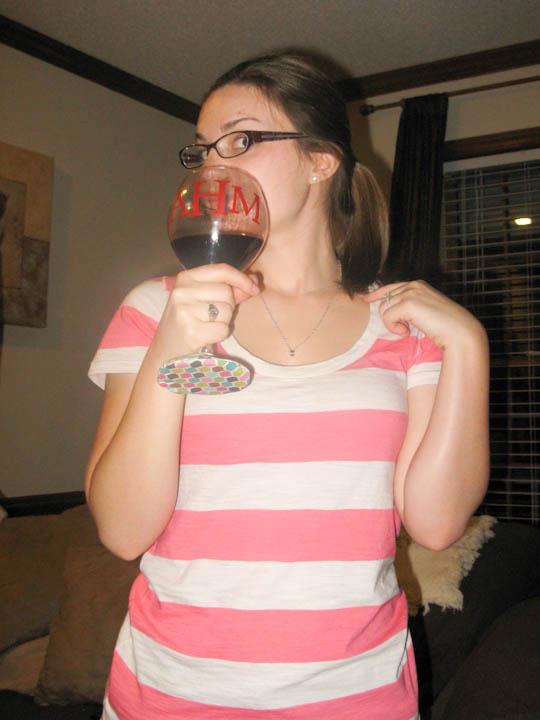
And finally, the gifts I'm obviously most proud of, hand-painted monogrammed wine glasses and wine-cork wall hanging, from me to Aubrey Hale. Inspiration taken from Whitney for the glasses (which are showcasing Abby's wine glass coasters, made for Rachel, to match the apron) and The Elephant's Trunk, via Caroline, for the wall hanging. Expect to see these again, too.

Let me know if you want step by step instructions for any of these, I'll try to hook it up!